
Okay, let’s dive deep into the world of de-shedding! This comprehensive guide will equip you with the knowledge and steps to significantly reduce the amount of loose hair your pet leaves around, promoting a healthier coat and a happier home.
A Comprehensive and Elaborate Guide on De-Shedding Treatments That Actually Work: A Step-by-Step Guide
Introduction: Understanding the Shedding Cycle
Shedding is a natural process where your pet replaces old or damaged hair. While all pets shed to some extent, some breeds (especially those with a double coat like Huskies, Golden Retrievers, German Shepherds, Great Pyrenees, etc.) shed a lot. De-shedding treatments are designed to proactively remove the loose, dead undercoat and surface hair before it ends up on your furniture, clothes, and floors.
Why De-Shed?:
Reduced Hair in the Home: The most obvious benefit!
Healthier Coat & Skin: Prevents matting, allows air circulation, and helps distribute natural oils.
Reduced Allergens: Less dander floating around.
Comfort for Your Pet: Especially in warmer months, shedding their heavy undercoat makes them more comfortable.
Bonding Opportunity: A regular grooming routine strengthens your bond.
Important Distinction: De-shedding is not the same as shaving. You should almost never shave a double-coated dog, as it can damage their natural insulation, expose their skin to sunburn, and potentially lead to “coat blow” where the fur grows back incorrectly. De-shedding removes loose fur, leaving the healthy coat intact.
Part 1: Pre-Treatment — Understanding Your Pet’s Coat & Shedding
Before you begin, it’s crucial to understand your pet’s specific shedding pattern and coat type.
1. Identify Your Pet’s Coat Type:
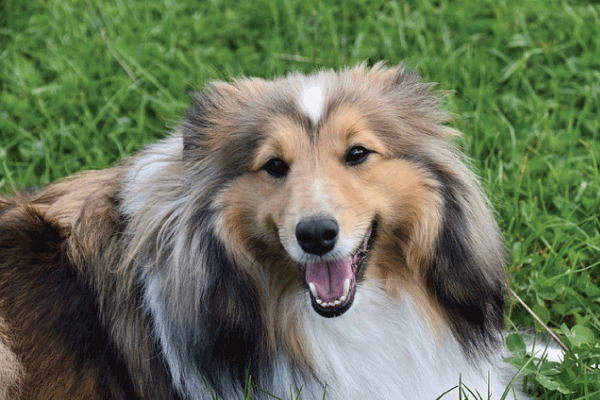
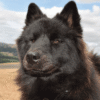
Double Coat: (e.g., Huskies, Golden Retrievers, Corgis, German Shepherds, Pomeranians) Consists of a soft, dense undercoat for insulation and a coarser, water-repellent topcoat. These are the primary candidates for intensive de-shedding.
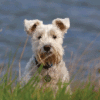
Single Coat: (e.g., Poodles, Greyhounds, Shih Tzus, Yorkshire Terriers) Lacks an undercoat. While they still shed, their grooming needs are different, focusing more on preventing mats and regular brushing. De-shedding tools are generally not suitable for these coats.
Wire Coat: (e.g., Terriers) Requires specific hand-stripping or plucking to maintain coat texture, not traditional de-shedding.
Short Coat: (e.g., Beagles, Labs – though some Labs can have a moderate undercoat) Sheds frequently but the hair is less noticeable. They still benefit from de-shedding, often with rubber brushes.
2. Understand Normal vs. Excessive Shedding:
Seasonal Shedding: Most double-coated dogs “blow their coat” twice a year (spring to shed winter coat, fall to shed summer coat) leading to heavy shedding for several weeks.
Continuous Shedding: Some breeds shed consistently year-round, often with peaks during seasonal changes.
When to Consult a Vet: If shedding is accompanied by bald spots, skin irritation, excessive scratching, dry/brittle fur, changes in appetite/behavior, or seems truly excessive out of season, it could indicate an underlying health issue (allergies, parasites, nutritional deficiencies, stress, thyroid issues). Always rule out medical problems first.
Part 2: Essential De-Shedding Tools & Products That Actually Work
Having the right tools is half the battle. Invest in quality items; they will pay for themselves in the long run.
A. Primary De-Shedding Tools:
De-Shedding Tool (e.g., FURminator, EquiGroomer, similar brands):
How it works: Features a fine-toothed blade designed to reach through the topcoat and grab loose undercoat without cutting the guard hairs.
When to use: On dry, clean, thoroughly detangled fur. Use with extreme caution and a light hand. Over-use can cause “brush burn” or damage the topcoat.
Best for: Double-coated dogs, and some short-haired breeds with dense undercoats.
Undercoat Rake:
How it works: Has long, blunt, widely spaced teeth that penetrate deep into the coat to pull out loose undercoat and break up minor mats. Different styles exist (single row, double row, rotating teeth).
When to use: Before bathing, or on dry fur, to remove initial bulk and detangle.
Best for: Long-haired, double-coated dogs.
Slicker Brush:
How it works: Features fine, bent wires that effectively remove loose hair, small mats, and tangles from the top layers of the coat.
When to use: Before any major de-shedding, to remove surface dirt and detangle. Also great for daily maintenance.
Best for: All coat types, especially medium to long.
Rubber Curry Brush / Grooming Glove:
How it works: The rubber nubs massage the skin, stimulate circulation, and effectively grab loose hair (especially short hair) and dirt.
When to use: During baths (lathers shampoo well), or on dry short-haired coats.
Best for: Short-haired dogs (Beagles, Pugs, Labs), but also useful for any coat during a bath.
High-Velocity (HV) Dryer (aka Force Dryer):
How it works: This is a professional-grade tool that blasts air at high speed, literally forcing water and loose undercoat off the pet. It’s incredibly effective and dramatically speeds up drying.
When to use: After bathing, while the coat is still damp. This is arguably the most effective de-shedding tool.
Caveats: Can be loud; introduce slowly. Always use a cool or low-heat setting. Protect your pet’s ears.
B. Supportive De-Shedding Products:
De-Shedding Shampoo: Formulated with ingredients (e.g., colloidal oatmeal, omega fatty acids, special surfactants) that help loosen the undercoat and deeply condition the skin and hair follicles, making the dead hair easier to release.
De-Shedding Conditioner: Crucial for softening the coat, reducing static, and further lubricating the dead hair so it slides out more easily during rinsing and drying. It also helps prevent future matting.
Towels: Absorbent microfiber towels help remove initial water after the bath.
Treats: For positive reinforcement throughout the process.
Ear Protection: For your pet (and yourself!) when using an HV dryer. Cotton balls or specific pet ear muffs can help.
Part 3: The Step-by-Step De-Shedding Treatment Process
This comprehensive process combines bathing, drying, and brushing techniques for maximum effectiveness. Ideally, this should be done in a secure, easy-to-clean area (like a bathroom, laundry room, or outdoors).
Step 1: Pre-Grooming & Detangling (Dry Coat)
Location: Set up in a place where loose fur is easy to contain (e.g., outdoors, or a room you can easily vacuum).
Secure Your Pet: Ensure your pet is comfortable and secure. A non-slip mat is helpful.
Initial Brush-Out: Use a slicker brush or undercoat rake to remove any significant mats, tangles, and the most obvious loose hair.
Technique: Brush in the direction of hair growth, working in small sections. Be gentle, especially around sensitive areas. NEVER use a de-shedding tool on matted fur. Mats must be gently worked out or safely cut out (if severe, consult a groomer).
Reward: Praise and treats for cooperation.
Step 2: The De-Shedding Bath
The bath is critical as it helps loosen the dead hair and hydrate the skin.
Water Temperature: Use lukewarm water, ensuring it’s comfortable for your pet.
Wet Thoroughly: Completely saturate your pet’s coat from head to tail (avoiding eyes and inner ears).
Apply De-Shedding Shampoo:
Generously apply the de-shedding shampoo, working it deep into the coat and skin.
Massage thoroughly for 5-10 minutes. Pay extra attention to areas where shedding is heaviest.
Allow the shampoo to sit for the recommended time (check bottle instructions, usually 5-10 minutes) to allow it to work its magic.
Rinse Thoroughly: This is crucial. Rinse until the water runs clear and you can’t feel any suds or residue. Shampoo residue can irritate skin and attract dirt faster.
Apply De-Shedding Conditioner:
Apply the de-shedding conditioner generously all over the coat, focusing on the same areas as the shampoo.
Massage it in well. The conditioner helps soften the hair shafts and further releases dead undercoat.
Allow it to sit for the recommended time (usually 5-10 minutes).
Rinse Extensively: Again, rinse, rinse, rinse! Ensure absolutely no conditioner residue is left behind. This can take longer than you expect, especially with thick coats.
Step 3: High-Velocity Drying (The Game Changer)
This is where you’ll see a massive amount of undercoat fly off.
Towel Dry: Use absorbent towels to remove as much excess water as possible.
Prepare for Drying:
Ear Protection: Place cotton balls loosely in your pet’s ears or use pet-specific ear muffs.
Your Protection: Earplugs for yourself are recommended if your HV dryer is loud.
Location: Ideally outdoors or in a contained space that’s easy to clean.
Use the High-Velocity Dryer:
Introduce Slowly: Start the dryer on a low setting and away from your pet, gradually bringing it closer. Praise and give treats.
Technique:
Work in sections, starting from the back and moving forward, or from the torso outwards.
Point the nozzle away from your pet’s face, ears, and genitals.
Use one hand to lift the coat and the other to direct the airflow. You will literally see clouds of loose undercoat flying out.
Move the dryer continuously. Don’t hold it in one spot for too long to avoid skin irritation or overheating.
Always use a cool or low-heat setting.
Goal: Dry the pet completely and blast out as much loose hair as possible. This step alone can remove 70-80% of the shedding hair.
Reward: Praise and treats throughout, especially when they tolerate the dryer well.
Step 4: Post-Dry De-Shedding Tool Application (Dry Coat)
Once your pet is completely dry, it’s time for the final pass.
De-Shedding Tool: Use your de-shedding tool (e.g., FURminator-style).
Technique: Use light, short, gentle strokes in the direction of hair growth. Start at the neck and work your way back, then down the legs.
Caution: Don’t press hard. Let the tool do the work. Over-brushing can cause skin irritation or remove too much healthy hair.
Monitoring: Regularly check your pet’s skin for any redness or irritation.
Clean the Tool: Frequently remove the collected hair from the tool to maintain its effectiveness.
Final Brush: Finish with a slicker brush or bristle brush to collect any remaining loose surface hair, smooth the coat, and distribute natural oils.
Step 5: Reward and Clean Up
Praise & Treat: Lavishly praise your pet and offer their favorite treats. A successful grooming session should end on a positive note.
Clean Up: Vacuum the grooming area thoroughly. Clean all your tools.
Part 4: Frequency, Maintenance & Troubleshooting
How Often to De-Shed:
Regular Shedders (Year-Round): Aim for a full de-shedding bath and blow-out every 4-8 weeks.
Seasonal “Coat Blowers”: During spring and fall, you might need to do a full de-shedding session every 2-3 weeks for a period of intense shedding.
Daily/Weekly Maintenance: Regular brushing with a slicker brush, undercoat rake, or grooming glove will help keep shedding under control between full sessions.
Advanced Tips:
Patience is Key: Especially when introducing the HV dryer. Keep sessions positive and short initially if needed.
Consistency: A regular routine is more effective than sporadic intense sessions.
Diet Matters: A high-quality diet rich in Omega-3 and Omega-6 fatty acids (e.g., fish oil supplements, flaxseed) supports skin and coat health, potentially reducing excessive shedding.
Hydration: Ensure your pet always has access to fresh water.
Stress Reduction: Stress can sometimes contribute to excessive shedding.
Humidity: In dry climates, static electricity can make brushing difficult. A conditioning spray can help.
When to Call a Professional Groomer:
Large Breeds: Handling a large, shedding dog in a home bathtub can be challenging. Professional groomers have specialized tubs and high-velocity dryers.
Extensive Matting: If your pet’s coat is severely matted, a professional can safely address it without causing pain or skin injury.
Time Constraints: De-shedding is time-consuming. If you lack the time, a groomer is a great option.
Difficult Temperament: If your pet is highly anxious or aggressive during grooming, a professional groomer is equipped to handle them safely.
Lack of Tools/Space: If you don’t have the space or budget for a full HV dryer setup, a groomer offers the best results.
Conclusion
De-shedding treatments, when done correctly and consistently, are incredibly effective in managing pet hair and promoting a healthy coat. By understanding your pet’s coat, investing in the right tools, and following a thorough step-by-step process, you can achieve professional-level results at home. Remember to be patient, positive, and always prioritize your pet’s comfort and safety. Happy grooming!
============================
#DeShedding, #DogCare, #PetGrooming, #DeSheddingTips, #DogShedding, #GroomingGuide, #HealthyCoat, #PetHealth, #DogLife, #DeSheddingTreatments


Add comment