
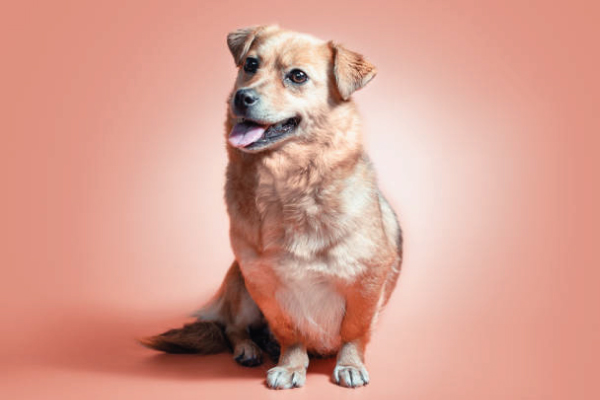
Help! My Dog HATES Baths: Troubleshooting Common Issues
Dealing with a dog who genuinely fears the bath can feel like preparing for battle. The good news is that bath aversion is rarely innate; it’s usually a result of specific negative associations (fear, pain, or lack of control).
This comprehensive guide will walk you through identifying the root causes, implementing a positive counter-conditioning plan, and troubleshooting the most common sticking points that turn bath time into a crisis.
PART 1: Identifying the Root Cause of the Hatred
Before you can fix the problem, you must identify why your dog hates the bath. It’s often not the water itself, but a combination of factors:
| Cause | The Dog’s Experience | Solution Focus |
|---|---|---|
| Lack of Traction (Slipping) | I feel unsteady, I might fall, I can’t escape. | Safety & Stability (Non-slip mats). |
| Noise Phobia | The sprayer sounds like a snake, the drain sounds like a monster, water splashing is startling. | Desensitization (Introducing sounds slowly). |
| High Water Pressure | Water hitting my body feels aggressive or painful. | Temperature & Flow Control (Gentle stream). |
| Forceful Handling | I am being held down, trapped, and can’t move naturally. | Control & Choice (Positive reinforcement, allowing movement). |
| Sensitivity | Water or soap got in my eyes/ears once and it hurt. | Protection (Cotton balls, specific rinsing techniques). |
| Temperature | The water is too cold or too hot. | Comfort (Lukewarm, body temp water). |
PART 2: Setting the Stage (The Essential Prep)
Preparation is 80% of the battle. Do not start training or bathing until you have all of these elements in place.
1. Safety and Stability
- Non-Slip Mat (Mandatory): Purchase a heavy-duty rubber bath mat or place a large towel down. Lack of traction is the #1 cause of panic in the tub.
- Tether (Optional, but Recommended): Use a lightweight harness (NEVER a neck collar) and a short leash secured to a sturdy anchor point near the tub to prevent jumping out, but ensure it allows the dog some movement.
2. High-Value Distractions
You need a distraction that lasts the entire duration of the bath. Low-value treats won’t cut it.
- Licking Mat or Kong: Smear peanut butter (xylitol-free), cream cheese, or wet dog food onto a silicone licking mat and stick it to the side of the tub. This sustained, self-soothing activity releases calming hormones.
3. Appropriate Tools
- Handheld Sprayer: A flexible, low-pressure sprayer gives you accuracy and control, preventing water from getting high on the dog’s face.
- Pitcher/Cup: For dogs severely phobic of the sprayer, a simple plastic pitcher can replace the hose entirely.
- Lukewarm Water: Always test the temperature carefully. Water that feels cool to you is often perfect for a dog.
PART 3: The Counter-Conditioning Plan (Desensitization)
The goal of counter-conditioning is to replace the dog’s fear response with a positive one. This requires patience and often needs to be done over several short sessions (5-10 minutes each) across multiple days or weeks.
Phase 1: Tub Neutrality
Stop thinking of the tub as a bathing station; it’s now a “Treat Delivery Center.”
- Introduce the Tub (Dry): Place the non-slip mat down. Toss extremely high-value treats (cheese, chicken) into the dry tub. Allow the dog to jump in and out freely to retrieve them.
- Mealtime Practice: Feed your dog a few full meals right next to or inside the dry tub. This builds a powerful positive association.
- Traction Test: While the dog is distracted with a chew or a lick mat, gently move the dog’s paws to confirm they feel secure on the mat.
Phase 2: Introducing Water and Noise
- Sound Desensitization: Turn on the water (sprayer) outside of the tub, at a low volume/flow. Treat the dog whenever the sound starts. Turn it off. Repeat 5-10 times during the session.
- Water Introduction (No Dog Involved): Run the water into the tub to show the dog the sight/sound of splashing, while they remain safely outside. Treat heavily while the water is running.
- The Wet Tub: Now, place the dog (with the distraction mat) into the tub, but do not turn the water on. Let them simply stand in a few inches of warm water and enjoy the treats.
Phase 3: The Quick Rinse
If the dog is relaxed with Phases 1 and 2, proceed to a quick “mock” bath.
- Start Low: Begin rinsing only the dog’s paws and lower legs, using a gentle stream or pitcher. Treat constantly.
- Distraction is King: Ensure the Lick Mat is firmly in place and the dog is focused on it.
- The Stop Signal: If the dog starts panting, shaking, or struggling, stop immediately. This ends the session on a neutral or positive note, rather than pushing them into a full panic. Short, positive sessions are better than long, traumatic ones.
PART 4: Troubleshooting Specific Phobias
Once you attempt a full bath, certain steps usually become the flashpoints for struggle.
1. The Head/Face Phobia (Eyes and Ears)
Dogs despise having water poured over their head, as it triggers a natural instinct to panic (waterboarding sensation) and risks ear/eye irritation.
- Use the Chin-Up Technique: Hold the dog’s chin up when rinsing the neck/chest. This prevents water from running down the face.
- The Washcloth Method: Instead of wetting the dog’s face, use a damp washcloth with a tiny amount of tearless shampoo to gently wipe the muzzle and forehead.
- Ear Protection: Place large cotton balls loosely inside the dog’s ear canals before the bath. Remember to remove them immediately afterward.
- Rinse from the Back: Always rinse the entire body starting from the tail and working forward, stopping at the neck.
2. The Blow Dryer Terror
The loud noise, hot air, and confined space make the blow dryer a significant trigger.
- Use the Happy Hoodie (Snood): This soft, elastic band covers the dog’s ears, muffling the noise of the dryer significantly.
- Decouple the Dryer from the Bath: Over several days, simply turn the dryer on (on a low, cool setting) in the same room while the dog eats or plays. Treat while it’s running.
- Start at a Distance: When drying, hold the dryer several feet away and direct it only at the back and tail. Slowly bring it closer, rewarding calmness. Never use a high-heat setting.
3. The Handling/Paws Phobia
If your dog stiffens or pulls away when you touch or lift their paws, they may be sensitive or have previously experienced pain.
- Practice Outside the Bath: Spend time daily handling the dog’s paws, massaging the toes, and applying gentle pressure while rewarding them (e.g., during TV time).
- The Distraction Lick Mat: For the bath, ensure the distraction is maxed out. You must be faster and more pleasant than the dog’s desire to pull away. Work quickly when washing the paws.
4. The Exit & Shake Terror
If your dog bolts or shakes violently upon exiting, they associate the exit with relief and maybe a slight chill.
- Have Towels Ready: Have a large, warm, fluffy towel immediately available.
- The Towel Wrap: Lift the dog gently onto a mat outside the tub and immediately wrap them like a burrito. Massage and soothe them while they are wrapped, providing an immediate sense of warmth and security before they have a chance to bolt.
PART 5: Key Takeaways and Warning Signs
Golden Rules of Bathing Fear
- Never Use Force: If your dog is struggling, fighting, or trying desperately to escape, forcing the issue will only confirm their fear. The fight-or-flight response overrides training.
- Keep it Short: For a phobic dog, a 5-minute, positive partial bath is infinitely better than a 20-minute struggle. You can always finish the job later, or hire a Fear-Free Certified groomer.
- Positive Ends the Session: Always ensure the session ends when the dog is doing something positive (even if it’s just standing still for a moment). Immediately reward that behavior and stop.
When to Seek Professional Help
If your dog demonstrates aggressive behavior (growling, snapping, biting) when trapped in the tub, or if the fear escalates despite consistent positive reinforcement, it’s time to call in the experts:
- Certified Fear-Free Groomer (Recommended): These professionals specialize in handling anxious pets, often using specialized techniques and even mild sedation recommendations (via a vet) to make the experience stress-free.
- Certified Veterinary Behaviorist (CVB): For severe phobias, a CVB can diagnose the root cause and may recommend conditioning plans or temporary, short-acting anxiety medication to help the dog calmly get through the initial necessary exposure.
=========================
#DogBaths, #DogGrooming, #PetCare, #DogTips, #BathTimeStruggles, #CanineBehavior, #DogAnxiety, #PetParenting, #Troubleshooting, #HappyDog


Add comment