
You’re looking to master the art of using a blow dryer on your dog, and that’s a fantastic goal! Proper blow-drying can significantly improve your dog’s coat health, reduce shedding, prevent matting, and even make bath time a more pleasant experience for both of you. However, it’s crucial to approach this with safety and effectiveness as your top priorities. Forced air, when used incorrectly, can cause discomfort, distress, or even injury to your furry friend.
This comprehensive guide will walk you through everything you need to know, from choosing the right dryer to advanced techniques for different coat types.
Section 1: Understanding the “Why” – Benefits of Blow Drying Your Dog
Before we dive into the “how,” let’s solidify why blow-drying is a beneficial practice:
- Faster Drying: Eliminates the dampness that can lead to chills, especially in colder weather or for short-haired breeds susceptible to cold.
- Reduced Matting and Tangling: For long-haired breeds, a blow dryer helps to gently separate and fluff the fur, significantly reducing the chances of mats forming.
- Improved Coat Health: The forced air can help to remove loose undercoat and debris, leaving the topcoat cleaner and healthier. It also distributes natural oils, adding shine.
- Less “Wet Dog Smell”: Damp fur is a breeding ground for bacteria that cause that distinct odor. Faster drying minimizes this.
- Enhanced Breed-Specific Grooming: Many breed-specific grooms rely on blow-drying to achieve the desired texture and volume.
- Comfort: A dry dog is a more comfortable dog, less prone to skin irritation from prolonged dampness.
Section 2: Choosing the Right Blow Dryer for Your Dog
Not all blow dryers are created equal, and using the wrong one can be detrimental. Here’s what to consider:
A. Types of Dog Blow Dryers:
- High-Velocity Dryers (Force Dryers):
- Pros: These are the professional groomers’ tools of choice. They deliver a powerful, concentrated stream of air that effectively blasts away water and loose undercoat. They are incredibly efficient, significantly reducing drying time.
- Cons: Can be very loud and intimidating for some dogs. Require careful use to avoid blowing debris into eyes or ears, and to prevent overheating. Generally more expensive.
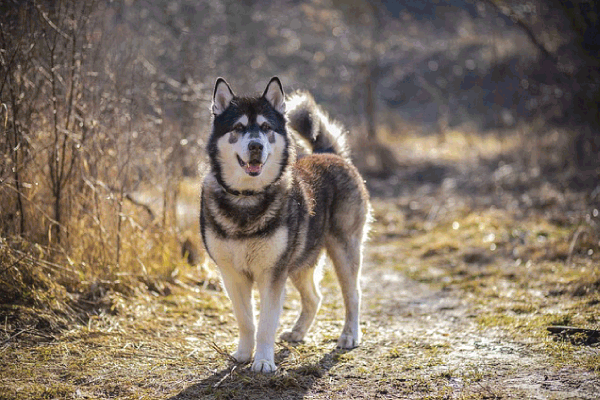
- Best For: Dogs with thick double coats (Huskies, German Shepherds, Golden Retrievers), professional groomers, and owners comfortable with training their dog to tolerate the noise and power.
- Stand Dryers (Cage Dryers):
- Pros: Gentler heat and airflow. Allow the dog to dry in a controlled environment (often a grooming cage). Can be less intimidating than high-velocity dryers.
- Cons: Significantly slower drying time. Risk of overheating if not monitored carefully. Can be a confined space, which some dogs dislike.
- Best For: Smaller dogs, anxious dogs, or dogs who need a gentler drying process.
- Regular Human Hair Dryers:
- Pros: Readily available, relatively inexpensive.
- Cons: Usually less powerful, meaning longer drying times. Can get very hot, increasing the risk of burns. Often louder and more jarring than specialized dog dryers. Lack the “force” needed to remove undercoat effectively.
- Best For: Very small dogs with short, thin coats, or for very brief touch-ups. Use with extreme caution and on the lowest heat/speed settings.
B. Key Features to Look For:
- Adjustable Heat Settings: Crucially important! Always opt for a dryer with multiple heat settings, including a cool or low-heat option. Never use high heat.
- Adjustable Speed/Airflow Settings: Allows you to control the intensity of the air, making it less overwhelming for your dog.
- Quiet Operation: While many dog dryers are noisy, some are designed to be quieter than others. This is a significant factor for anxious dogs.
- Nozzle Attachments: Different nozzles can concentrate the airflow, help with fluffing, or distribute it more broadly.
- Durability and Weight: If you’ll be holding the dryer for extended periods, a lightweight and ergonomically designed model is beneficial.
Section 3: Safety First – Essential Precautions for Blow Drying
This is the most critical section. Prioritize your dog’s well-being above all else.
A. Temperature is Paramount:
- NEVER Use High Heat: High heat can easily burn your dog’s skin, leading to pain, blistering, and even permanent damage.
- Always Use the Lowest Effective Heat Setting: Start with the coolest setting and gradually increase only if necessary and always test the air temperature on your own skin first.
- Feel the Air: Before directing the air at your dog, feel it on the back of your hand or wrist. It should feel comfortably warm or cool, never hot.
B. Airflow Control:
- Start on Low Speed: Begin with the lowest airflow setting and gradually increase as your dog becomes more comfortable.
- Never Aim Directly at Face, Eyes, or Ears: The sensitive skin and structures in these areas are highly susceptible to damage from direct, forceful air. Keep the dryer moving and avoid prolonged focus on any one area.
- Be Mindful of Ears: Dogs’ ears are delicate. Avoid blowing air directly into the ear canal. You can gently dry the outer ear flap from a distance.
C. Noise and Vibration:
- Introduce Gradually: The sound and vibration can be very frightening. Start with the dryer on in a different room while you are with your dog, then gradually bring it closer.
- Positive Reinforcement: Associate the dryer with treats and praise.
- Don’t Force It: If your dog is showing extreme fear or anxiety, stop. You may need to desensitize them over multiple sessions.
- Consider Ear Protection: For very sensitive dogs, groomers sometimes use ear covers designed for dogs.
D. Skin Sensitivity:
- Avoid Over-Drying: Over-drying can strip natural oils from the skin and coat, leading to dryness, flakiness, and irritation.
- Watch for Redness: If you notice any redness on your dog’s skin, stop immediately.
E. Handling and Restraint:
- Secure but Gentle: Ensure your dog is in a secure, non-slip grooming area. If using a grooming table, use a lead that prevents them from jumping off but isn’t too tight.
- Two-Person Job (Initially): If you’re new to this or have a wiggly dog, having a second person to hold and reassure your dog can be incredibly helpful.
Section 4: The Step-by-Step Guide to Blow Drying Your Dog
Now, let’s get to the practical application.
A. Preparation is Key:
- Brush Thoroughly Before the Bath: This removes loose hair and tangles that will only become worse when wet.
- Towel Dry Extensively: Squeeze out as much water as possible with absorbent towels. This significantly reduces drying time. You can even use a microfiber pet towel for extra absorption.
- Detangle (If Necessary): If any small tangles remain after towel drying, gently work them out with a comb or brush before applying the dryer.
- Choose the Right Location: A well-ventilated area is best, especially if you’re using a high-velocity dryer. A grooming table with a non-slip surface is ideal.
- Gather Your Tools: Have your dryer, nozzle attachments, brush, and treats ready.
B. The Drying Process:
- Acclimation (The “Sniff and Treat” Phase):
- Turn the dryer on briefly in a separate room or at a distance.
- Offer a high-value treat and praise.
- Gradually decrease the distance and increase the duration the dryer is on, always associating it with positive reinforcement.
- Never force your dog to endure the dryer if they are showing extreme fear. This process can take days or even weeks.
- First Touch (Low and Slow):
- Set your dryer to the lowest heat and lowest speed setting.
- Hold the dryer at least 12-18 inches away from your dog.
- Gently direct the air at a large, flat area of their body (e.g., flank, back) – never directly at their face or ears.
- Keep the dryer constantly moving in sweeping motions.
- Offer treats and praise frequently.
- Working Through the Coat:
- Systematic Approach: Work methodically over your dog’s entire body. A common approach is to start from the tail and work your way forward, or from the hindquarters to the head.
- Lift and Dry: For thicker coats, you’ll want to lift sections of the fur and direct the air down to the skin. This ensures the undercoat dries properly and prevents mats from forming closest to the skin.
- Brush While Drying: For longer-haired dogs or those prone to tangles, use a slicker brush or a comb simultaneously with the dryer. Brush in the direction of hair growth while directing the airflow. This helps to detangle and fluff the coat.
- Legs and Paws: Pay attention to drying between the toes and paw pads, as moisture here can lead to fungal infections.
- Tail and Underside: Gently dry these areas, being careful of sensitive spots.
- Face and Head (Use Extreme Caution):
- Coolest Setting Only: Use only the coolest setting.
- Keep Distance: Hold the dryer as far away as is effective, and keep it moving constantly.
- Angle Away from Face: Direct the air so it blows away from their eyes, nose, and mouth. You can even use your hand to shield their face while drying.
- Towel Dry First: Often, the face can be mostly towel-dried, and the dryer used only for a quick, gentle fluffing.
- Finishing Touches:
- Once the coat is mostly dry, you can increase the speed slightly if your dog is comfortable, to get a more polished finish.
- Give a final gentle brush to ensure no tangles remain.
- Offer a final treat and plenty of praise!
Section 5: Tailoring Techniques for Different Coat Types
The drying method will vary based on your dog’s fur.
A. Double-Coated Breeds (e.g., Huskies, German Shepherds, Golden Retrievers, Samoyeds):
- Goal: Remove loose undercoat, dry down to the skin.
- Method: High-velocity dryers are most effective. Work the air into the coat, lifting sections to reach the skin. Brush with a slicker brush or undercoat rake while drying to pull out loose fur. Be thorough, as trapped moisture in the undercoat can lead to skin issues.
B. Long-Coated Breeds (e.g., Afghan Hounds, Shih Tzus, Yorkshire Terriers):
- Goal: Prevent tangles, create a smooth, flowing, and shiny coat.
- Method: Use a dryer with a nozzle that concentrates airflow. Brush constantly with a slicker brush or comb as you dry, working in the direction of hair growth. Start with low speed and gentle heat, and keep the dryer moving to avoid “frying” the hair.
C. Smooth-Coated Breeds (e.g., Beagles, Boxers, Pugs):
- Goal: Quick drying, adding shine.
- Method: A regular human hairdryer on a cool/low setting or a low-speed dog dryer can work. Towel dry very thoroughly first. Simply direct the airflow over the body to speed up the process and give a nice sheen. Avoid prolonged drying.
D. Curly-Coated Breeds (e.g., Poodles, Bichons Frises, Portuguese Water Dogs):
- Goal: Achieve a fluffy, voluminous, and well-defined curl.
- Method: Often requires a high-velocity dryer and a slicker brush or comb. Dry the coat upwards and outwards to create volume, using the brush to lift and separate curls as you go. Ensure you dry down to the skin to prevent “hot spots” and matting hidden within the curls.
Section 6: Troubleshooting Common Issues
- Dog is Terrified: Go back to the desensitization process. Shorter sessions, more treats, lower noise, and distance are your friends. Consider a quieter dryer or a stand dryer.
- Matting Despite Drying: You may not be drying down to the skin enough, or not brushing sufficiently. Ensure you’re lifting the coat and working the air to the base.
- Skin is Red or Irritated: You’re likely using too much heat or holding the dryer too close for too long. Stop immediately, consult your vet if concerned, and adjust your technique drastically.
- Drying Takes Too Long: Ensure you’re towel-drying as much as possible beforehand. A high-velocity dryer will dramatically speed things up. For long-haired dogs, check for tangles that are making drying inefficient.
Section 7: When to Call a Professional Groomer
- Extreme Fear/Anxiety: If your dog’s fear is unmanageable, a professional groomer has techniques and experience to handle it.
- Severe Matting: Heavily matted dogs often require professional de-matting or even shaving, which is a specialized skill.
- Difficult Coat Types: If you’re struggling with a specific coat type or breed-specific grooming needs.
- Skin Issues: If you suspect your dog has a skin condition that the dryer might be exacerbating.
Conclusion: Patience, Practice, and Positive Reinforcement
Mastering the blow dryer is a skill that develops over time. Be patient with your dog and with yourself. Every dog is an individual, and what works for one may not work for another.
Key Takeaways for Safe and Effective Blow Drying:
- LOW HEAT IS NON-NEGOTIABLE.
- KEEP THE DRYER MOVING.
- AVOID FACE, EYES, AND EARS.
- LISTEN TO YOUR DOG – IF THEY’RE UNCOMFORTABLE, STOP.
- ASSOCIATE DRYING WITH POSITIVE REINFORCEMENTS.
- BRUSH AS YOU DRY FOR LONG-HAIRED BREEDS.
- DRY DOWN TO THE SKIN FOR DOUBLE-COATED BREEDS.
By following these guidelines, you can transform blow-drying from a potential chore into a beneficial grooming practice that enhances your dog’s comfort and appearance. Happy drying!
===================
#DogGrooming, #DogDryer, #BlowDryer, #ForcedAirDryer, #GroomingTips, #SafeGrooming, #PetCare, #DryingDogs, #DIYGrooming, #PetGrooming, #GroomingTutorial, #DogSafety, #CanineCare, #PetParents


Add comment