
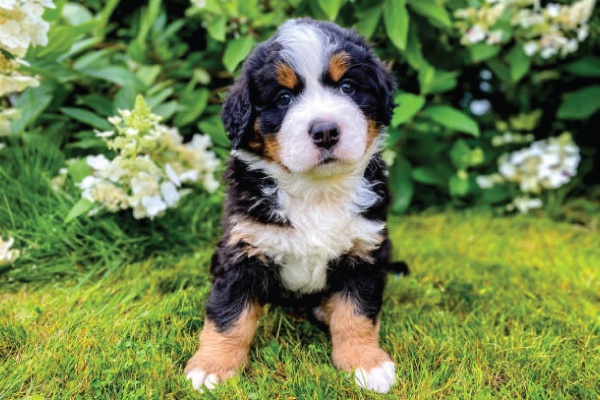
Bathing your dog isn’t just about getting them clean; it’s an essential part of their health, hygiene, and overall well-being. While professional groomers have the tools and experience, with a little knowledge and practice, you can replicate many “groomer’s secrets” at home, turning a dreaded chore into a bonding experience and ensuring your furry friend looks and feels their best.
This comprehensive guide will walk you through every step, from preparation to the final flourish, revealing the techniques that set professional baths apart.
I. The Groomer’s Mindset: More Than Just a Bath
Before you even turn on the water, adopt a professional groomer’s approach:
- Observation is Key: Use this time to inspect your dog thoroughly. Check for:
- Skin issues: Redness, flakes, rashes, bumps, parasites (fleas, ticks).
- Coat condition: Mats, tangles, excessive shedding, dullness.
- Lumps, bumps, or tender spots: Note anything unusual.
- Ear health: Redness, discharge, odor.
- Paw pads: Cracks, foreign objects.
- Patience & Positive Reinforcement: A calm, confident demeanor from you will translate to a calmer dog. Use treats, praise, and a soothing voice throughout the process. Make it a positive experience.
- Preparation is Paramount: A professional doesn’t scramble for supplies mid-bath. Everything is ready before the dog enters the tub.
II. Essential Tools of the Trade (The Groomer’s Arsenal)
Having the right equipment makes all the difference.
- Brushes & Combs:
- Slicker Brush: Essential for detangling and removing undercoat.
- Pin Brush: For longer coats, helps separate hair.
- Undercoat Rake/De-shedding Tool (e.g., Furminator): Crucial for double-coated breeds to remove loose undercoat before the bath.
- Fine-tooth Comb: For checking for tangles, especially behind ears, armpits, and tails.
- Shampoos & Conditioners:
- pH-Balanced: Always use dog-specific products. Human shampoos are too acidic and can irritate canine skin.
- Dilution Bottle (Groomer’s Secret #1): Professional groomers always dilute shampoo. It spreads better, rinses easier, and prevents residue. Aim for a 10:1 or 16:1 water to shampoo ratio, depending on the product.
- Specific Formulas: Choose based on your dog’s needs: oatmeal for sensitive skin, whitening for light coats, de-shedding, flea/tick, puppy, etc.
- Drying Equipment:
- High-Absorbency Towels: Several of them! Microfiber towels work wonders.
- Force Dryer (Groomer’s Secret #2): This is the single biggest difference between a home bath and a professional one. It blows water off the coat, dries quickly, straightens hair, and removes loose undercoat. It’s an investment but pays dividends in time, effectiveness, and coat health.
- Human Hair Dryer (CAUTION): If you don’t have a force dryer, use this on the coolest or lowest heat setting only, kept moving constantly. High heat can burn a dog’s skin very quickly.
- Safety & Comfort:
- Non-Slip Mat: Essential for the tub to prevent slips and anxiety.
- Cotton Balls: To protect ears from water.
- Ear Cleaner (Dog-specific): For post-bath cleaning.
- Eye Lubricant/Protective Eye Drops: Can be used to protect eyes during the bath (check with your vet).
- Treats: High-value treats for positive reinforcement.
- Leash/Harness: For control, especially in an unfamiliar bathing area.
- Bathing Area:
- A tub or utility sink works well.
- Hose Sprayer/Detachable Shower Head: Allows for thorough wetting and rinsing.
III. Strategic Pre-Bath Preparation (The Foundation)
This step is critical and often overlooked, leading to major problems.
- Thorough Brushing & De-Matting (Groomer’s Secret #3):
- NEVER wet a matted dog. Water causes mats to tighten and become virtually impossible to brush out without pain and potential skin damage.
- Use your slicker brush, comb, and de-shedding tools to remove as many tangles, mats, and loose hair as possible before the bath. Work slowly and gently. If you encounter severe matting, it’s safer to have it professionally shaved out or trimmed before bathing.
- Nail Trim & Paw Pad Trim (Optional but Pro): It’s often easier to trim nails and remove excess hair from paw pads before they get wet and soft, or right after the bath before drying.
- Hydrate & Potty Break: Ensure your dog has had a drink and relieved themselves to prevent accidents during the bath.
- Gather All Supplies: Place everything within arm’s reach of the tub. You don’t want to leave your dog unattended.
- Protect Ears (Groomer’s Secret #4): Gently place cotton balls in your dog’s ear canals. Do not push them in too deep, just enough to block water entry. Remove them after the bath, before drying.
- Secure Your Dog: For safety, use a grooming loop or leash attachment if your dog is prone to jumping or escaping the tub.
- Positive Introduction: Coax your dog into the bathing area with treats and praise. Start the water quietly.
IV. The Bathing Process: Step-by-Step Mastery
Now, the main event!
A. Wetting Down: The Deep Soak
- Water Temperature: Use lukewarm water, similar to what you’d use for a baby’s bath. Test it on your inner wrist.
- Thorough Saturation:
- Start wetting from your dog’s neck down to the tail, then work on the legs and paws. Avoid spraying directly into the face first.
- Groomer’s Secret #5: Work Against the Grain: For dense or double coats, push the hair up and spray water against the direction of hair growth to ensure water penetrates all the way to the skin. This is crucial for proper cleaning.
- Ensure every inch of the dog’s coat and skin is completely saturated. This can take several minutes for a dense-coated breed.
B. The Double Shampoo Method (Groomer’s Secret #6)
Professionals rarely shampoo once.
- First Lather (The “Break-Down” Wash):
- Apply your diluted shampoo. Work it into the coat, starting from the back and moving forward.
- Massage the shampoo vigorously, working it thoroughly into the skin, not just the fur. Pay special attention to dirty areas like paws, armpits, groin, and the base of the tail.
- This first shampoo breaks down dirt, oil, and grime. Don’t worry if it doesn’t lather profusely; its job is to lift the initial layer of dirt.
- Rinse the First Lather: Thoroughly rinse out this first shampoo. This is key to removing most of the loosened dirt and old oils.
- Second Lather (The “Deep Clean” & Treatment):
- Apply diluted shampoo again. You’ll notice it lathers much more easily this time.
- Continue to massage deeply, ensuring the shampoo gets to the skin. This is where the shampoo’s specific benefits (e.g., soothing, de-shedding, whitening) truly take effect.
- Face Cleaning (Groomer’s Secret #7): For the face, use a damp washcloth with a tiny dab of tearless dog shampoo or just plain water. Gently wipe the muzzle, around the eyes (avoiding direct contact), and head. Wipe away from the eyes.
C. Rinsing: The Most Crucial Step! (Groomer’s Secret #8)
This is where most home bathers fall short. Residue from shampoo or conditioner can cause skin irritation, itching, dryness, dandruff, and dullness, and can even attract dirt faster.
- Rinse, Rinse, Rinse: Rinse until you believe all the shampoo is gone, and then rinse for another 3-5 minutes.
- Technique:
- Use your sprayer to rinse thoroughly, again working from neck to tail, top to bottom.
- Lift legs, tail, and head to ensure you rinse the undersides.
- Once again, push your fingers and the sprayer against the grain of the fur to flush out all residue from the skin.
- Feel the Coat: Run your hands through the coat. If it feels “slick” or “slippery,” there’s still shampoo. It should feel clean and slightly “squeaky.”
- Squeeze excess water from the coat, especially on longer fur.
D. Conditioning (The Professional Finish):
Conditioner helps lock in moisture, detangle, reduce static, add shine, and protect the coat.
- Application: Dilute your dog-specific conditioner (if recommended) and apply it evenly throughout the coat, paying attention to areas prone to tangles.
- Dwell Time: Allow the conditioner to sit for the recommended time (usually 3-5 minutes) to penetrate the hair shaft.
- Rinse Conditioner: Rinse thoroughly again, but often not as extensively as the shampoo rinse. Some conditioners are designed to leave a very slight residue for shine and protection, but always follow product instructions to avoid a greasy feel.
V. The Drying Process: The True Test of a Professional Bath
Proper drying is essential for preventing matting, skin issues (like hot spots or mildew), and a “damp dog” smell.
A. Towel Drying: The First Pass
- Blot, Don’t Rub (Groomer’s Secret #9): Vigorously rubbing with a towel can create tangles and static. Instead, gently squeeze and blot the water out of the coat with several absorbent towels. Wrap your dog in a large towel like a burrito to soak up as much moisture as possible.
- Remove Ear Plugs: Once the initial toweling is done, gently remove the cotton balls from your dog’s ears.
B. Force Drying (The Game Changer – Groomer’s Secret #10):
If you have a force dryer, this is where it shines.
- Acclimate Your Dog: Start the dryer on a low setting a few feet away so your dog can get used to the noise and sensation. Offer treats.
- Technique:
- Start from the back of the dog and work your way forward.
- Always keep the nozzle moving.
- Aim the stream of air under the coat, lifting the hair away from the skin. This blows water out of the coat rather than just onto the surface.
- Brush while Drying: Use your slicker brush or pin brush simultaneously to straighten the coat, eliminate tangles, and remove any remaining loose undercoat. This is called “line drying” or “fluff drying.”
- Safety: Never aim the dryer directly at the eyes, ears, or genitals. Keep a safe distance to prevent skin irritation. Ensure the air isn’t too hot (most force dryers have no heat or very low heat). Protect sensitive ears with ear covers if your dog is stressed by the noise.
- Thoroughness: Continue until the coat is completely dry—down to the skin. For dense or double coats, this can take 30 minutes to an hour or more. Any dampness left in the undercoat can lead to hot spots or skin infections.
C. Hair Dryer (If no Force Dryer):
- Low/Cool Setting ONLY: Use only the cool or lowest heat setting. Continually check the skin temperature with your hand to prevent burns.
- Keep Moving: Never hold the dryer in one spot.
- Brush: Brush continuously while drying to help dissipate moisture and prevent matting.
- Least Effective: This method takes much longer and is less effective at removing water from the undercoat compared to a force dryer.
D. Air Drying (Least Recommended):
Avoid air drying for most breeds, especially those with long, dense, or double coats. It can lead to:
- Matting: As the hair dries, it shrinks and can tighten into mats.
- Skin Issues: Dampness trapped against the skin creates an ideal environment for bacteria and yeast, leading to hot spots, skin infections, and mildew smell.
VI. Finishing Touches (The Polished Look)
Once your dog is completely dry:
- Final Brush Out: Give your dog a final thorough brush to ensure there are no missed tangles and their coat is smooth and fluffy.
- Ear Cleaning: Gently clean the outer ear flap and ear canal with a dog-specific ear cleaner applied to a cotton ball. Never insert anything into the ear canal.
- Eye Wipes: Use a damp cloth or pet-safe eye wipe to gently clean any tear stains around the eyes.
- Paw Pad & Sanitary Trim (Advanced): If comfortable and skilled, you can trim the hair between the paw pads level with the pads, and carefully trim the hair around the sanitary areas for hygiene. Use blunt-nosed scissors or small clippers. If unsure, leave this to a professional.
- Dog Cologne/Spritz (Optional): A light spray of dog-specific cologne can add a pleasant scent, but ensure it’s not irritating to your dog.
- Praise & Treats: Lavish your clean, fluffy dog with praise, affection, and high-value treats to reinforce a positive association with bath time.
VII. Troubleshooting & Common Challenges
- Fear of Water/Tub: Introduce the tub gradually with treats. Start with just stepping in, then water in the bottom, then gentle rinsing. Use a non-slip mat.
- Biting/Aggression: If your dog becomes aggressive, stop immediately. Consider seeking assistance from a professional groomer or a certified dog trainer. A muzzle may be necessary for safety.
- Mats Post-Bath: If you find mats after the bath, and they are small, try to work them out gently with a detangling spray and a comb. For larger mats, it’s safer to carefully clip them out or consult a professional.
- Skin Irritation: If your dog develops redness or itching, ensure you’ve rinsed all shampoo out. Try an oatmeal shampoo for sensitive skin. If it persists, consult your vet.
VIII. When to Call a Professional
While these techniques will greatly improve your home bathing, there are times when a professional groomer is the best choice:
- Severe Matting: Beyond what you can safely brush or trim out.
- Complex Breed Styling: If your dog requires specific breed clips.
- Extreme Fear or Aggression: For the safety of both you and your dog.
- Skin Conditions: If your dog has a chronic skin issue that requires specific medicated baths or careful handling.
- Lack of Equipment: If you don’t have a force dryer, long-haired, dense-coated, or double-coated breeds will benefit greatly from professional drying.
By incorporating these “groomer’s secrets” into your home bathing routine, you’ll not only achieve a cleaner, healthier, and better-looking dog, but you’ll also build a stronger bond through a more positive and effective grooming experience. Happy bathing!
=================================
#DogBathing, #DogGrooming, #PetGrooming, #HomeGrooming, #DIYDogGrooming, #GroomerSecrets, #ProfessionalGrooming, #GroomingTips, #DogBath, #CleanDog, #HappyDog, #HealthyDog, #PetCare, #DogCare, #AtHomeGrooming, #PetParentTips, #DogOwnerLife, #LearnToGroom, #FreshDog, #DogHygiene, #DogShampoo, #GroomingHacks, #ExpertGrooming, #PuppyBath, #DogLife


Add comment