
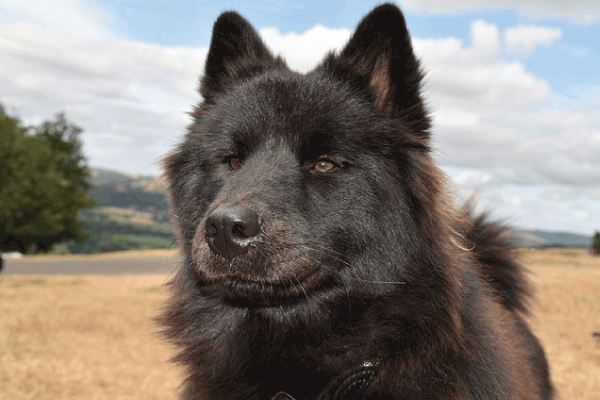
A double coat—found on breeds such as Huskies, German Shepherds, Samoyeds, Golden Retrievers, and Bernese Mountain Dogs—is a marvel of natural engineering. It works as a highly efficient, year-round thermal regulator, keeping dogs cool in summer and warm in winter.
However, a double coat requires specialized maintenance. Improper brushing can damage the protective guard hairs or leave the dense undercoat trapped, leading to overheating, severe matting, and painful skin conditions.
This ultimate guide covers the anatomy of the double coat, the essential tools, and the professional techniques required to keep your dog healthy, comfortable, and beautiful.
Part I: Understanding the Double Coat
Before touching a brush, you must understand what you are maintaining. A double coat consists of two distinct layers, each with a specific function:
1. The Outer Coat (Guard Hairs)
Appearance: Long, coarse, straight, and shiny.
Function: This layer protects the dog from the elements—repelling water, blocking UV rays, and shielding the skin from dirt and debris. It should never be cut or shaved, as this compromises the dog’s natural insulation and makes them susceptible to sunburn and hot spots.
2. The Undercoat (Insulating Coat)
Appearance: Soft, dense, short, and often cotton-like fluff.
Function: This is the temperature control layer. It traps air to provide warmth in winter and acts as a barrier against heat in summer.
The Problem: The undercoat sheds profusely twice a year (the seasonal “blowout”). If this dead, loose hair is not brushed out, it creates a thick, felt-like layer that prevents air circulation, trapping moisture and heat—a major cause of overheating and painful matting against the skin.
Part II: The Essential Grooming Arsenal
You cannot effectively groom a double coat with a single household brush. A combination of specific tools is necessary to work through both layers safely.
1. The Workhorse: Undercoat Rakes (De-Shedding Rakes)
This is the most crucial tool for double-coated breeds.
Purpose: To penetrate the heavy outer coat and gently pull the dead, loose undercoat out without cutting the guard hairs.
Key Feature: Look for rakes with long, rounded steel tines that are spaced widely apart. The tines must be long enough to reach the skin.
2. The Detailer: Slicker Brush
Purpose: Excellent for loosening light surface mats, fluffing up the coat after a rake session, and working around sensitive areas (like the legs and flanks) where the coat is thinner.
Key Feature: A slicker brush has fine, bent wires set closely together on a flat or curved head. Always use light pressure to avoid “brush burn.”
3. The Tester: Metal Greyhound Comb
Purpose: This is your final quality control tool. If the comb cannot glide easily through the coat from the tip of the hair all the way to the skin, you are not finished brushing that section.
Key Feature: Needs both widely spaced teeth (for the body) and narrowly spaced teeth (for the legs and facial hair).
4. The Prepper: Grooming Conditioning Spray
Purpose: Never brush a dry coat. Brushing a dry coat causes static, breakage of the hair shaft (damaging the guard hairs), and friction. A light spritz of an anti-static, detangling, or conditioning spray lubricates the hair, making brushing easier and preventing breakage.
Tools to Use with Caution or Avoid:
Tool Usage Context: Warning:
Furminator-style tools
Usage Context: Only during heavy shedding season, very sparingly.
Warning: Can be overly effective, potentially cutting healthy guard hairs if used too aggressively or frequently.
Pin Brush (Rubber-tipped)
Usage Context: Good for finishing/fluffing, not for de-shedding.
Warning: The tips prevent the brush from reaching the undercoat and are ineffective for removing deep dead hair.
Scissors/Clippers
Usage Context: NEVER on the body.
Warning: Shaving ruins the coat’s thermal properties, often causing the coat to grow back patchy, coarse, and unable to regulate temperature (called “coat funk”).
Part III: The Technique: Line Brushing
The only effective way to brush a double coat is through a systematic process known as line brushing. This ensures you reach the skin and remove all the trapped undercoat.
Step 1: Prep and Position
Preparation: Lightly mist the entire section you plan to work on with your conditioning spray.
Dog Comfort: Ensure your dog is comfortable, ideally on a non-slip table or secured area, to promote patience and stillness.
Step 2: Establish the Line
Part the Coat: Using your free hand, firmly part the coat, horizontally against the direction of hair growth, until you can see the skin (like parting your own hair). Hold the bulk of the hair above this line out of the way.
The Goal: You should now have a small, approximately one-inch strip of hair exposed, starting near the bottom of the thigh, shoulder, or chest.
Step 3: Brush the Section (Rake First)
Use the Undercoat Rake: Starting at the bottom of the exposed strip, pull the rake gently through the hair with long, smooth strokes.
Crucial: The tines must lightly scratch the skin. If you are not touching the skin, you are only brushing the top layer and leaving the undercoat behind.
Clear the Area: Continue raking this strip until no more loose hair comes out.
Drop the Next Layer: Release a small amount of the hair you were holding back, creating a new, overlapping strip. Repeat the raking process.
Work Systematically: Continue this process, section by section, working in lines moving up the dog’s body (e.g., from the belly up to the spine).
Step 4: Refine and Fluff (Slicker Brush)
Once you’ve finished a major area (like a flank or shoulder) with the rake, follow up with the slicker brush.
Purpose: The slicker brush removes any short, final dead hairs missed by the rake and fluffs the coat, checking for tangles near the surface.
Step 5: The Comb Check
Take your metal greyhound comb and run it through the entire brushed area, from the tip of the hair shaft down to the skin.
If the comb stops or snags, you have missed a tangle or a patch of trapped undercoat. Go back to that spot, hold the hair tight near the snag, mist it with spray, and use the rake again until the comb glides through effortlessly.
Step 6: Repeat
Repeat Steps 2-5 for the entire dog:
Start with one side of the neck, move across the shoulder, down the flank, and finish on the thigh.
Do the opposite side.
Finish with the chest, tail, and pantaloons (the dense hair on the back of the legs).
Part IV: Frequency and Seasonal Maintenance
Consistency is key to managing a double coat and preventing matting disasters.
Maintenance (Non-Shedding)
Recommended Frequency: 2–3 times per week
Focus: Quick rake session focusing on friction areas (behind the ears, armpits, inner thighs) and a full body slicker/comb check.
Seasonal Blowout (Spring/Fall)
Recommended Frequency: Daily or Every Other Day
Focus: Intensive line brushing sessions, often lasting an hour or more, to remove the massive amounts of shedding undercoat.
After Swimming/Bathing
Recommended Frequency: Immediately
Focus: Water can tighten existing, minor tangles into severe mats. Always ensure the dog is fully dry and brushed out thoroughly after getting wet.
Dealing with the Seasonal Blowout
Twice a year, double-coated dogs “blow” their coat. During this time, the amount of hair coming off may seem endless.
Pro Tip: Force Drying: If you bathe your dog at home, using a high-velocity pet dryer (not a human hairdryer) is one of the most effective ways to remove 90% of the dead undercoat. The intense, cool air blasts the hair right out of the coat before you even start brushing.
Handling Knots and Mats
If you find a knot that the rake cannot easily penetrate:
Stabilize: Hold the hair tightly at the base of the mat (close to the dog’s skin) to prevent pulling on the skin while you work.
Spray: Saturate the mat with grooming spray or detangler.
Split: Use a mat splitter tool or the tip of a metal comb to gently pick apart the mat from the outside edges inward. Never aggressively pull or rip.
Know When to Stop: If the mat is extremely large, close to the skin, or causing your dog distress, stop immediately. Attempting to pull out severe mats can cause significant pain and skin trauma. This is the time to call a professional groomer or veterinarian for professional removal.
Part V: Safety and Final Reminders
Patience is paramount. Double-coat grooming is a lengthy process. Keep sessions positive and provide high-value rewards.
Grip: Hold the brush or rake handle near the head, not at the end. This gives you more control and prevents you from applying too much pressure.
Check the Skin: If the skin appears red, irritated, or if you find any bumps (often signs of hot spots), cease brushing that area and consult your veterinarian immediately.
Shaving is not the solution. While it may seem easier, shaving a double-coated dog is often detrimental, confusing the hair follicles and resulting in poor regrowth and compromised insulation. Proper brushing is the safer and healthier alternative.
===================================
#DoubleCoatedDogs, #DogGrooming, #BrushingTips, #Deshedding, #Undercoat, #Shedding, #GroomingGuide, #DogCare, #CoatHealth, #PetHealth, #GermanShepherd, #SiberianHusky, #DogHacks


Add comment