
This is an excellent topic for a detailed guide, as proper trimming around a dog’s eyes and muzzle is crucial for their health, comfort, and safety.
Here is a comprehensive and elaborate guide:
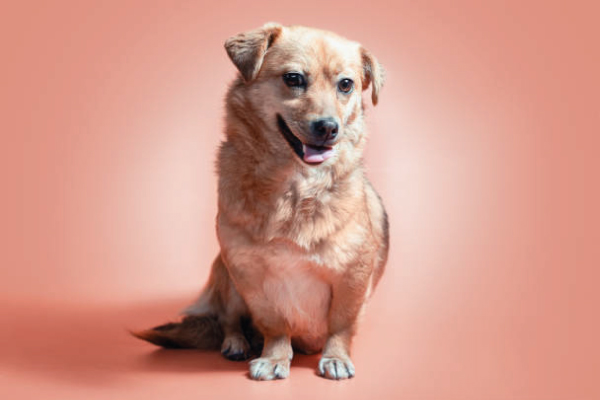
Trimming the hair around your dog’s eyes and muzzle is not merely a matter of aesthetics; it is a vital practice for maintaining their health, comfort, and ability to see clearly. Excess hair can harbor bacteria, block vision, cause tear staining, and irritate sensitive skin.
This guide provides step-by-step instructions, essential tools, and critical safety tips to help you manage this delicate grooming task successfully at home.
Ⅰ. Preparation: Setting the Stage for Success
Before you even pick up the scissors, proper preparation is the key to a calm and safe grooming session.
A. Essential Tools
Using the right tools minimizes the risk of injury and ensures a neat finish. Never use standard household scissors.
| Tool | Purpose | Key Feature |
|---|---|---|
| Blunt-Tipped Grooming Scissors | The primary tool for cutting around the eyes. | Rounded or ball tips prevent punctures if the dog moves suddenly. |
| Thinning Shears (Optional) | Used to soften the look, blend layers, or thin out overly dense hair. | Cuts only a fraction of the hair, reducing blunt lines. |
| Grooming Comb (Fine-toothed) | Essential for separating, lifting, and directing the hair. | Helps you see exactly where to cut and removes tangles. |
| Electric Trimmers/Clippers (Small Detail) | Best for the muzzle/whiskers on certain breeds (e.g., Poodles, Schnauzers). | Offer more control and speed than scissors on large areas. |
| Styptic Powder | A must-have safety product. | Stops minor nicks from bleeding immediately. |
B. Preparation Steps
- Establish Calm: Choose a time when your dog is relaxed (often after a vigorous walk or playtime). Use a calm tone and offer treats frequently.
- Proper Lighting: Work in a well-lit area so you can clearly see the eyes, the hair, and any potential abnormalities.
- Clean and Dry Coat: The hair must be clean and completely dry. Washing removes debris and makes the hair easier to manage. Wet hair stretches and will appear shorter when dry, leading to accidental over-cutting.
- Secure the Dog: Use a non-slip surface and, if necessary, a secure grooming loop or lead attached to a sturdy table to prevent the dog from jumping off. A second person can be invaluable for gently steadying the dog’s head.
Ⅱ. Trimming Around the Eyes (The Most Critical Area)
The area around the eyes is the most sensitive and dangerous. Precision and patience are paramount.
A. Technique for Clearing Vision
The goal is to clear the hair obscuring the vision and preventing it from falling onto the cornea.
- Lift and Inspect: Use a fine-toothed metal comb to gently lift the hair on the bridge of the nose, separating the strands that are touching the eyes.
- Isolate the Hair: With your non-dominant hand, gently hold the dog’s head steady, placing your thumb just below the eye socket (not on the eyeball). This provides leverage and stability.
- Measure the Cut: Place the comb directly against the skin, lifting the hair straight up. The hair you cut should be the hair that extends past the comb.
- The Safe Cut: Use blunt-tipped scissors and cut parallel to the bridge of the nose. Never point the scissors directly toward the eye. Hold the points of the scissors facing away from the eye socket.
B. Managing Irritation and Tears (The “V” Cut)
For dogs prone to excessive tearing (e.g., Maltese, Shih Tzus), a modified “V” cut can keep the area drier.
- Comb Down: Comb the hair around the inner corner of the eye (the canthus) downwards.
- Create the Angle: Use the blunt-tipped scissors to make a very shallow, inverted “V” shape just below the inner corner of the eye. This removes the hair wick that draws moisture onto the face, promoting better ventilation and reducing tear staining buildup.
- Wipe Clean: After trimming, use a clean, damp cloth or a special tear-stain wipe to clean the residue.
Ⅲ. Trimming Around the Muzzle and Mouth
The muzzle trim addresses cleanliness, hygiene (food and water absorption), and the dog’s overall expression.
A. The Beard and Underside of the Muzzle
This area is particularly prone to holding food, moisture, and bacteria.
- Comb Out Debris: Thoroughly comb out any food particles or matting from the beard area. Mats here are painful and hold odor.
- Hold the Snout: Gently cup the dog’s muzzle in your non-dominant hand, holding the mouth closed, or have your helper do so.
- Scissoring the Underside: Using your blunt-tipped scissors or detail clippers (running with the grain of the hair for a natural finish), trim the hair underneath the chin and along the jawline. The goal is to make the hair just short enough that it doesn’t drag in the water bowl or pick up food when eating.
B. Trimming the Whiskers (A Note of Caution)
Whiskers (vibrissae) are crucial sensory organs. They help the dog navigate, especially in low light or when approaching objects.
- Aesthetic Trimming (Show Dogs): For many breeds (especially Poodles and Schnauzers), the whiskers are traditionally clipped for a clean look. If you choose to clip them, use clippers set to a very short blade (e.g., #10 or #15) and do so quickly.
- Safety & Comfort: For most pet owners, it is recommended to leave the whiskers intact. If they are excessively long or bothersome, only trim the surrounding hair, leaving the vibrissae themselves alone.
C. Near the Lips (Hygiene)
Hair growing directly over the lips often gets wet and stained.
- Lift the Lip: Gently lift the upper lip to expose the hair at the corner of the mouth.
- Detail Trim: Use the tips of the blunt scissors to carefully trim any hair that extends past the lip crease. This reduces the wicking action of saliva and food particles.
Ⅳ. Advanced Safety and Handling Tips
1. The “Skin Pinch” Test
Before cutting any hair that lies flat against the skin (especially the thin skin below the eye), gently lift the hair with the comb and pinch the skin lightly below where you plan to cut. If you can pinch the skin, the hair is too close, and you should use extreme caution or trim only the very ends.
2. Guarding the Eye
When using scissors near the eye, the palm of your non-dominant hand should be braced on the dog’s head, and your thumb used as a stop or guard to prevent the dog from thrusting their head forward into the moving blades.
3. Dealing with Squirming
Never try to force the trim on a highly agitated dog. If the dog is squirming uncontrollably, stop immediately and try again later. Forcing it dramatically increases the risk of serious injury.
4. Frequency is Key
Trimming small amounts more frequently (every 2–4 weeks) is much easier and safer than waiting until the hair is painfully matted or completely blocking vision. Frequent trims also habituate the dog to the process.
5. Cleaning Up Tear Stains
If hair has been stained by tears, the stain will remain even after trimming. Use a mild, vet-approved tear stain product or a diluted saline solution to gently cleanse the area daily, focusing on the skin underneath the eyes as well as the hair.
Summary of Safety Directives
- NEVER use pointed scissors near the eyes.
- ALWAYS cut with the scissors parallel or perpendicular to the dog’s head, never pointing inward.
- KEEP styptic powder within arm’s reach.
- SECURE the dog’s head gently but firmly to prevent sudden movement.
- STOP if the dog becomes stressed; resume the session later.
===================
#DogGrooming, #PetCare, #DogTrimming, #GroomingTips, #DogEyes, #DogMuzzle, #DIYDogGrooming, #PetGrooming, #HappyDog, #DogHealth, #CanineCare, #DogBeauty, #GroomingSafety, #PetTips, #HomeGrooming


Add comment